You’ve heard that Google Search Console is a valuable tool for SEO and improving your website’s visibility on Google, but where exactly do you start? With so many reports and metrics, Search Console can seem overwhelming. Don’t worry; we’ll break it down for you step-by-step.
By the end of this guide, you’ll have a solid understanding of how Search Console works and how to use the essential reports to gain valuable insights into how Google sees your site. You’ll be unlocking the power of Search Console in no time and optimising your site like a pro.
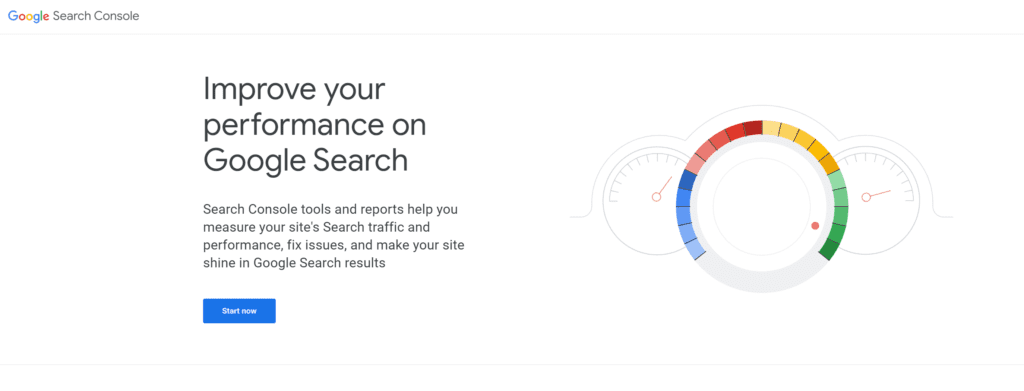
What Is Google Search Console and Why Use It?
Google Search Console is a free tool from Google that gives you insights into how your website is performing in Google Search. Why use it? For starters, it helps you understand how visible your site is to searchers and spots any issues preventing Google from indexing your content.
Search Console provides a wealth of data to help you improve your site’s visibility and user experience. Check it regularly and take action on any errors or issues it flags. Optimising your site for search will lead to higher traffic, more links, and better rankings over time. By unlocking the power of Search Console, you’ll gain valuable insights to strengthen your web presence.
Setting Up Google Search Console for Your Site
You’ll first need to connect your website to unlock the power of Google Search Console. This allows Google to provide tailored reports and recommendations specific to your site.
Claiming your site
The easiest way to verify your site’s ownership is by adding a file to your site’s root directory. You’ll be given a code to add to an HTML file, which Google will detect to confirm you own the site.
Once verified, you’ll gain access to the Search Console dashboard. This is where you’ll find reports and tools to help improve your site’s visibility in Google Search results.
Exploring the reports
Once verified, you can access various reports to help you understand how Google indexes your site. The most useful ones are:
- Coverage – See which pages Google has discovered on your site. Check for any missing important pages and consider optimising them to help Google find them.
- Index – Check how much of your site Google has indexed. A lower percentage could indicate crawl issues you need to address.
- Search analytics – See how people search for and find your website in Google Search. Useful for identifying popular search terms to target.
- Performance – Monitor how your pages rank in Google Search and any fluctuations in traffic. Look for any drop-offs in impressions or clicks that could indicate a penalty or drop in rankings.
- Security issues – Be alerted to any hacked pages or malware on your site that could affect your rankings or users.
Improving your rankings
With regular monitoring and by acting on the insights gleaned from the reports, you’ll be well on your way to unlocking the power of Google Search Console and claiming your spot at the top of the SERPs. The rewards of higher traffic and more visibility will make the effort worthwhile.
Using the Index Coverage Report for Better Indexing
Google Search Console provides a wealth of useful data to help you optimise your website and content for search. Some of the most important reports you should be checking regularly are:
Performance Report
This report gives you an overview of how your site is performing in Google search results. It shows metrics like:
- Impressions: The number of times your site appeared in search results. More impressions generally mean more people are finding your content.
- Clicks: The number of clicks your site received in search results. A higher click-through rate (CTR) means your titles and snippets resonate well with searchers.
- Average position: Where your site ranks on average in the search results. A higher position means ranking closer to the top of the first page.
- Top keywords: The search terms driving the most traffic to your site. Focus your optimisation efforts on these keywords to improve performance.

International Targeting
If your site targets international audiences, the International Targeting report is useful. It shows the percentage of your site Google considers internationalized for different locales. A higher score means your site is well optimized for searchers in that country or language. Focus on improving internationalization for locales that drive significant traffic to your site.
Monitoring and optimizing based on these reports will help increase your search visibility and traffic over time. Make checking them a regular part of your SEO routine.
Pages Report
This report provides data on how individual pages on your site are performing in search. It allows you to see metrics for your most important pages, like:
- Impressions and clicks: How many times the page appeared in results and how many clicks it received.
- Average position: The page’s average ranking position for its target keywords.
- Top keywords: The search terms driving the most traffic to that specific page.
- Mobile-friendliness: Whether the page is optimized for mobile devices. Non-mobile-friendly pages won’t rank as well in search.
- Index status: If the page is indexed, not indexed, or pending indexing. Make sure all your important pages are indexed in Google.
The Pages report is key to diagnosing issues with specific pages and optimizing them to improve performance. By keeping on top of the data in these reports, you’ll gain valuable insights into how to enhance your search rankings and increase traffic from Google.
The Index Coverage report in Google Search Console provides insights into how Google discovers and indexes your site’s content. Monitoring this report regularly can help you improve indexing and ranking in Google Search.
Identifying Crawl Errors
The Index Coverage report highlights any crawl errors Google encounters on your site. Some common errors include:
- Blocked URLs: Indicates Googlebot was unable to access certain pages or sections of your site. Check for noindex tags, robots.txt files blocking access, or server errors.
- Soft 404 errors: Googlebot found URLs that returned a 404 status code but the page content suggests the URL was not actually missing. Double check that your 404 page is configured properly.
- Server errors: Googlebot received a 5xx status code when accessing your site. Look for any server overload issues or misconfigurations and fix them.
- No content: URLs that returned a 200 status code but the page was empty or had little meaningful content. Add quality content to these pages or consider removing them.
Discovering Unindexed Content
The Index Coverage report also shows you content on your site that is eligible to be indexed by Google but hasn’t been indexed yet. Some reasons content may be unindexed include:
- New content: Googlebot simply hasn’t crawled your site recently enough to find the new content. Be patient, as Googlebot crawls most sites regularly.
- Noindex tags: You may have accidentally added a noindex tag to a page you want indexed. Double check and remove any incorrect noindex tags
- Broken internal links: If the new content isn’t linked to from indexed pages on your site, Googlebot may not be able to discover it. Strengthen your internal linking structure.
- Robots.txt blocking: Your robots.txt file may be incorrectly blocking Googlebot’s access to certain pages. Update your robots.txt to allow access to the content you want indexed.
Monitoring your Index Coverage report regularly and optimizing based on the insights within it can significantly improve your site’s crawl efficiency and indexing. Be proactive and prioritise indexing issues to unlock the full potential of Google Search!
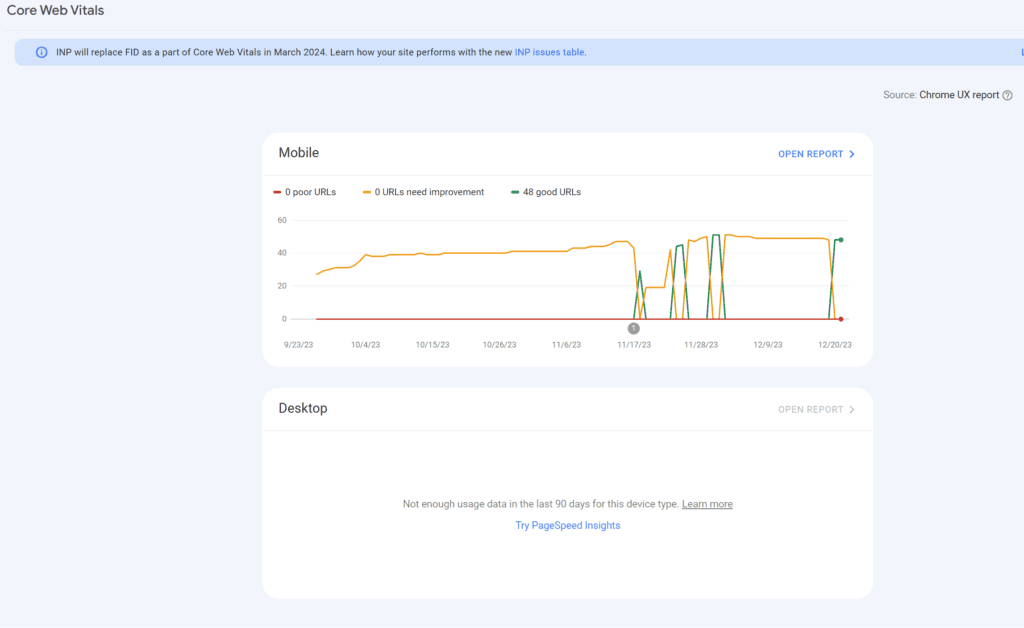
Check Your Core Web Vitals Report
To optimize your site’s Core Web Vitals in Google Search Console, there are a few key steps to take. Core Web Vitals are metrics that measure aspects of web performance and user experience. Optimizing them will help improve your search ranking and user experience.
In the Search Console dashboard, click ‘Core Web Vitals’ under ‘Enhancements’. This report shows you how your site is performing on key metrics like Largest Contentful Paint, First Input Delay and Cumulative Layout Shift. Aim for all metrics to be in the green ‘Good’ range.
Diagnose Issues
If any metrics show as ‘Needs Improvement’ or ‘Poor’, click to diagnose the issues. This may highlight specific pages, devices or locations that need work. Check if the issues are due to:
- Heavy images
- Render-blocking JavaScript
- Server response times
- Third party code
Make Improvements
Based on the issues found, implement fixes and optimizations to your site. Some things you can do include:
- Compressing images and enabling lazy loading.
- Moving render-blocking scripts to the footer or loading them asynchronously.
- Minimizing redirects and optimizing server performance.
- Auditing and optimizing any third party scripts.
- Minifying CSS and JavaScript.
- Enabling browser caching.
Head back to the Core Web Vitals report in Search Console to check your improvements, the report updates every 28 days. Continue optimizing and monitoring your metrics, re-diagnosing any new issues. The more you can improve, the better experience for your users and the higher your search rankings can go.
With regular optimization and monitoring through Search Console, you’ll be well on your way to unlocking the power of Core Web Vitals for your site. Keep making progress and don’t get discouraged – every improvement you make will benefit your users and search rankings. Check out our in-depth guide to Core Web Vitals
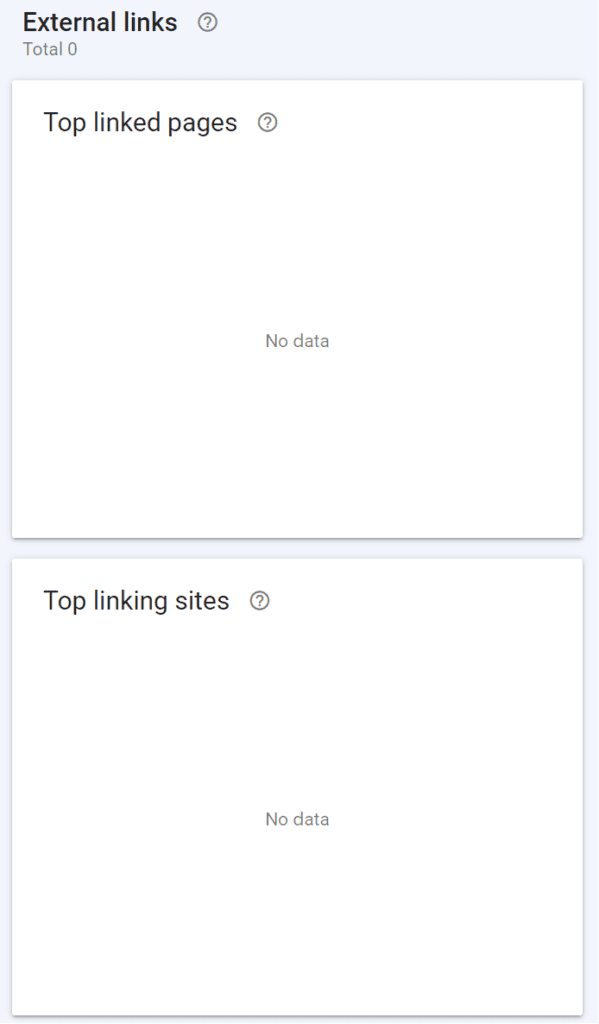
Identifying Bad Backlinks With the Links Report
The Links report in Google Search Console provides insights into the backlinks pointing to your site. Backlinks are links from other websites to your site. Google uses backlinks to determine authority and rankings, so it’s important to check for any bad backlinks that could hurt your site.
Bad backlinks are links from low-quality, spammy, or unrelated sites. Some signs of a bad backlink include:
- The link contains keywords unrelated to your site content. These are likely spam links trying to manipulate rankings.
- The link comes from a site with little content or lots of ads. These sites exist solely to generate links and provide no value to users.
- The link uses automated link building software. If a site has hundreds of links that look identical, it’s likely using software to mass generate links.
- The anchor text of the link contains exact match keywords. Overly optimized anchor text is a sign the link is meant solely for search engine manipulation.
- The link comes from a site in a unrelated niche or industry. Legitimate links typically come from authoritative sites in your field.
To find bad backlinks in Search Console:
- Go to the Links report under Search Traffic.
- Filter the links by “Low quality”. This will show links from low-quality domains that could hurt your rankings.
- Manually check other links for signs they are unnatural or spammy. Look at the linking site and anchor text to determine if the link provides value.
- Once you’ve identified bad links, you’ll need to disavow them. This tells Google to ignore those links when evaluating your site.
Disavowing links is an important part of link building and maintaining a healthy backlink profile. Keeping your backlinks clean and high quality is key to achieving and sustaining good search rankings. Regularly check your Links report and take action against any bad backlinks pointing to your site.
Managing Shopping Ads With Google Search Console
To optimize your shopping ads in Search, you’ll want to use the Shopping report in Google Search Console. This report provides metrics like impressions, clicks and click-through rate (CTR) specifically for your shopping ads. It also gives you insights into how shoppers are interacting with your ads so you can make improvements.
View Shopping Ad Performance
The Overview tab shows your shopping ad impressions, clicks, CTR and average position over the last 90 days. Check that you’re seeing good impressions and an improving CTR over time. If not, you may need to refine your shopping feed, bids or ad copy.
- Impressions: How often your shopping ads were shown. Aim for steady or increasing impressions.
- Clicks: The number of times shoppers clicked your shopping ads. Look for clicks that increase with impressions.
- CTR: Your click-through rate, calculated as (clicks/impressions) x 100. A CTR of 2-5% is average. Try to improve your CTR over time through optimizing your feed, raising bids, improving ad copy or choosing more relevant products.
- Average position: Where your ads appear on the search results page on average. A higher position, closer to 1, means your ads are appearing higher up the page. Check your average position is steady or improving.
See How Shoppers Interact With Your Ads
The Dimensions tab shows metrics segmented by device, ad position, product, and more so you can see how each factor impacts your shopping ad performance. Look for any areas that need improvement and take action.
- Device: See if shopping ads on mobile or desktop perform better and adjust your strategy accordingly.
- Ad position: Check if higher ad positions lead to more clicks and a better CTR. You may need to raise your bids to improve position.
- Product: Find your top-performing products as well as those with low CTRs. Refine or remove underperforming products from your feed.
- Time: See if certain days of the week or times of day lead to the most shopping ad activity. You can then adjust your budget to maximize performance during those periods.
By monitoring your shopping ad metrics in Search Console and making ongoing optimizations, you’ll drive more relevant clicks and sales from Google Shopping. Be sure to check in on your Shopping report at least once a month to stay on top of the latest trends and insights.
Submitting Sitemaps for Faster Indexing
Submitting sitemaps helps Google discover all of your website pages so they can be indexed faster. A sitemap is an XML file that lists the URLs for your site. By submitting sitemaps to Google Search Console, you’re giving Google a roadmap to help them find all of your content.
Create your sitemap
The first step is to create an XML sitemap for your site. There are a few ways to generate a sitemap:
- Use a sitemap generator like Yoast, Rank Math or Semrush. These plugins automatically generate a sitemap for your WordPress site.
- Manually create an XML sitemap. If you have a small site, you can easily create your own XML sitemap. You’ll need to list every page on your site in the format:
“`xml
<url>
<loc>https://www.example.com/page1.html</loc>
<lastmod>2021-01-01</lastmod>
<changefreq>monthly</changefreq>
<priority>0.8</priority>
</url>
“`
- Or use a crawler like Screaming Frog or Sitebulb to crawl your site and export an XML sitemap.
- If you use a CMS like WordPress, check if it has a built-in sitemap generator. Many CMSs can automatically generate sitemaps for you.
Submit your sitemap to Search Console
Next, you need to submit your sitemap to Google Search Console. Here’s how:
- Sign in to Google Search Console and click Sitemaps.
- Click the Submit a sitemap button.
- In the form that appears, enter the URL of your sitemap XML file. For example, https://example.com/sitemap.xml
- Click Submit.
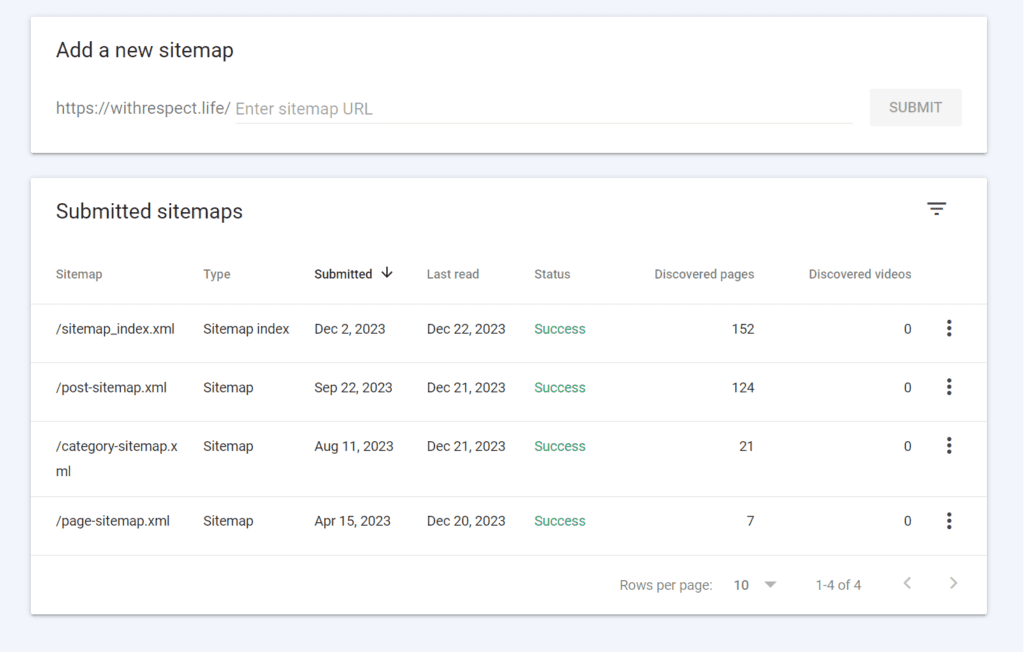
Google will now use your sitemap to discover and crawl all the URLs listed in your sitemap. Submitting a comprehensive sitemap is one of the best ways to improve indexing and ranking for your website. Be sure to update your sitemap frequently as you add new content to your site.
Understanding Google Search Console and how you can use it to test, optimize and monitor your success in organic search and it’s an important tool for any SEO.